 八蛋的程式派對
側邊欄NavigationDrawer+多層TreeView之實現
介紹
Navigation Drawer通常是從左邊邊緣拉出來的一個選單,是現在很常看到的UI元件。Google有提供此功能,這裡將使用Google提供的功能,來做到此效果,需用到DrawerLayout和NavigationView。DrawerLayout的功能是用來做從左到右拉出來的效果,NavigationView則是用來在拉出來的畫面上顯示資料和選單。 TreeView是一種在Windows常見的多層清單表示方式,而在Android中只提供了ExpandableListView,最多只支援到兩層清單的表示,所以如果想實現三層或多層的清單,就需要我們自己客製了,TreeView已有人做出,我將他改成自己需要用的字合併到Navigation Drawer,達到實現側邊欄裡還要能顯示多層清單的功能。
NavigationDrawer-設定Style
開啟AndroidManifest.xml確認使用android:theme為@style/AppTheme。再開啟styles.xml,將AppTheme的parent改為Theme.AppCompat.Light.NoActionBar,並加入以下items。
<style name="AppTheme" parent="Theme.AppCompat.Light.NoActionBar">
<!-- Customize your theme here. -->
<item name="colorPrimary">#212121</item>
<item name="colorPrimaryDark">#187817</item>
<item name="windowActionBar">false</item>
<item name="windowNoTitle">true</item>
<item name="android:windowFullscreen">true</item>
<item name="android:windowActionModeOverlay">true</item>
<item name="android:windowDrawsSystemBarBackgrounds">true</item>
<item name="android:statusBarColor">@android:color/transparent</item>
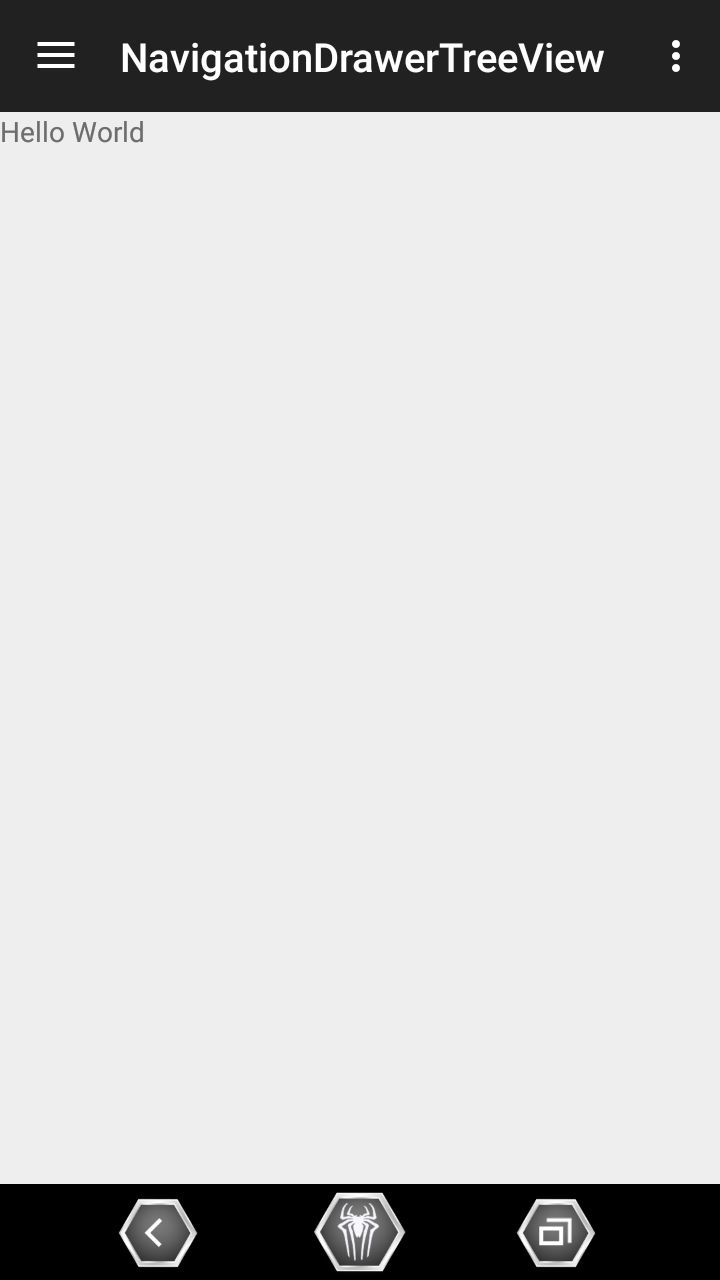
</style>NavigationDrawer-設定layout
再來設定layout,DrawerLayout主要是一個跟畫面(root view),裡面只能包含兩個view,一個是主要內容的view,另一個是拉出來的選單view,這裡以LinearLayout和TextView來作為主要內容。NavigationView分上下兩部分,上面的是headerLayout,下面的是menu,通常會設置res/menu,然後再載入。activity_main如下。
<android.support.v4.widget.DrawerLayout xmlns:android="http://schemas.android.com/apk/res/android"
    xmlns:tools="http://schemas.android.com/tools"
    xmlns:app="http://schemas.android.com/apk/res-auto"
    android:id="@+id/drawerLayout"
    android:layout_width="match_parent"
    android:layout_height="match_parent"
    android:fitsSystemWindows="true"
    tools:context="com.ietm.navigationdrawertreeview.MainActivity">

    <LinearLayout
        android:layout_width="match_parent"
        android:layout_height="match_parent"
        android:orientation="vertical">

        <android.support.v7.widget.Toolbar
            android:id="@+id/toolbar"
            android:layout_width="match_parent"
            android:layout_height="@dimen/abc_action_bar_default_height_material"
            android:background="?attr/colorPrimary"
            android:minHeight="?attr/actionBarSize"
            android:theme="@style/ThemeOverlay.AppCompat.Dark.ActionBar"/>

        <TextView
            android:id="@+id/contentView"
            android:layout_width="wrap_content"
            android:layout_height="wrap_content"
            android:text="Hello World"/>
    </LinearLayout>

    <android.support.design.widget.NavigationView
        android:id="@+id/navigationView"
        android:layout_width="wrap_content"
        android:layout_height="match_parent"
        android:layout_gravity="start"
        app:headerLayout="@layout/drawer_header"
        app:menu="@menu/drawer"/>

</android.support.v4.widget.DrawerLayout>
drawer_header,可自行加入圖片或個人頭像,我只用TextView加上背景色。
<RelativeLayout xmlns:android="http://schemas.android.com/apk/res/android"
android:layout_width="match_parent"
android:layout_height="190dp"
android:background="#FF0000">
<TextView
android:id="@+id/name"
android:layout_width="match_parent"
android:layout_height="wrap_content"
android:layout_marginLeft="24dp"
android:layout_marginStart="24dp"
android:layout_alignParentBottom="true"
android:text="Royshow"
android:textSize="18sp"
android:textColor="#fff"
android:textStyle="bold"
android:paddingBottom="8dp"/>
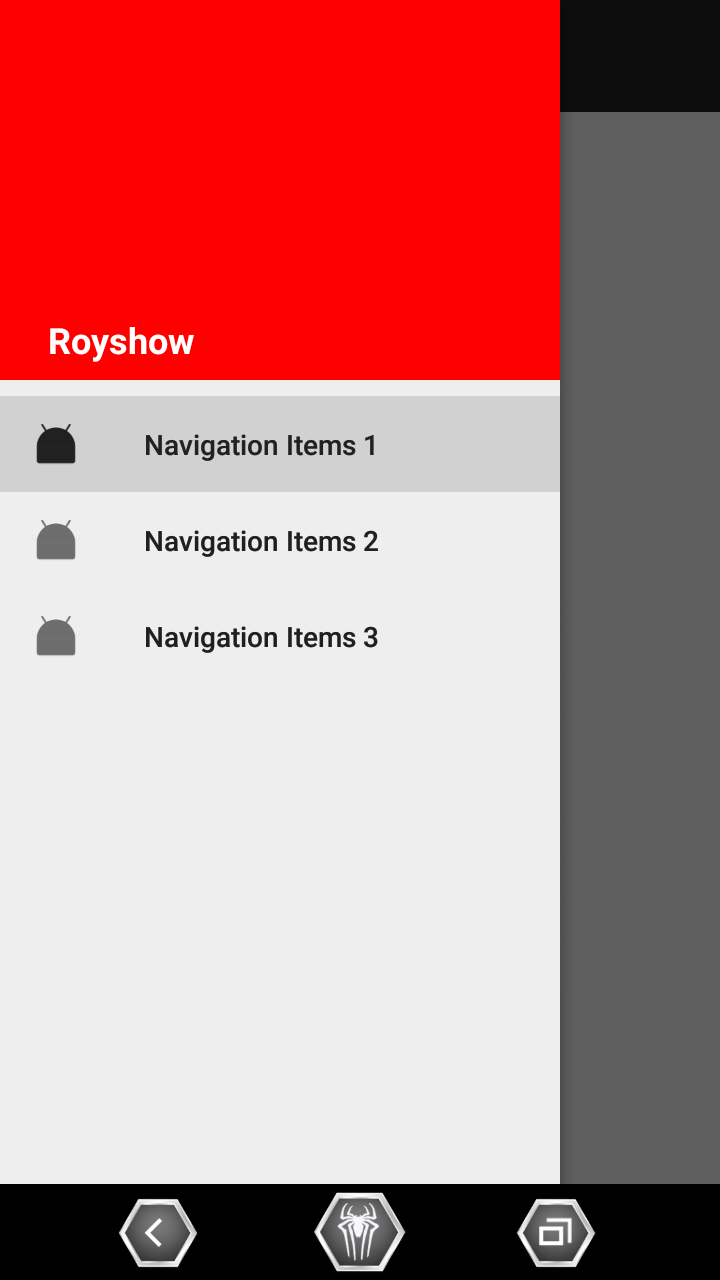
</RelativeLayout>NavigationDrawer-設定menu
將menu,設置在res/menu/drawer,如下。
<menu xmlns:android="http://schemas.android.com/apk/res/android">
    <group android:checkableBehavior="single">
        <item
            android:id="@+id/navigationItem1"
            android:checked="true"
            android:icon="@drawable/ic_launcher"
            android:title="Navigation Items 1"/>
        <item
            android:id="@+id/navigationItem2"
            android:icon="@drawable/ic_launcher"
            android:title="Navigation Items 2"/>
        <item
            android:id="@+id/navigationItem3"
            android:icon="@drawable/ic_launcher"
            android:title="Navigation Items 3"/>
    </group>
</menu>
在onCreate中加入以下程式,
final Toolbar toolbar = (Toolbar) findViewById(R.id.toolbar);
setSupportActionBar(toolbar);

contentView = (TextView) findViewById(R.id.content_view);
drawerLayout = (DrawerLayout) findViewById(R.id.drawer_layout);
NavigationView view = (NavigationView) findViewById(R.id.navigation_view);
view.setNavigationItemSelectedListener(new NavigationView.OnNavigationItemSelectedListener() {
    @Override public boolean onNavigationItemSelected(MenuItem menuItem) {
        Toast.makeText(MainActivity.this, menuItem.getTitle() + " pressed", Toast.LENGTH_LONG).show();
        contentView.setText(menuItem.getTitle());

        menuItem.setChecked(true);
        drawerLayout.closeDrawers();
        return true;
    }
});
將ToolBar改成ActionBar。並為Navigation加上OnNavigationItemSelectedListener,這樣按menuItem的話,就會顯示toast。 執行試一試,drawerLayout可以拉出來。
NavigationDrawer-加上三圖示
這個要利用actionBarDrawerToggle來做了,到onCreat()加上actionBarDrawerToggle,如下。
ActionBarDrawerToggle actionBarDrawerToggle = new ActionBarDrawerToggle( this, drawerLayout, toolbar, R.string.openDrawer , R.string.closeDrawer){
           @Override
           public void onDrawerClosed(View drawerView) {
                super .onDrawerClosed(drawerView);
           }

           @Override
           public void onDrawerOpened(View drawerView) {
                super .onDrawerOpened(drawerView);
           }
      };

      drawerLayout.setDrawerListener(actionBarDrawerToggle);
      actionBarDrawerToggle.syncState();
這樣三就出來了。
TreeView-Element.java
public class Element {

    private String contentText;
    private int level;
    private int id;
    private int parendId;
    private boolean hasChildren;
    private boolean isExpanded;
    public static final int NO_PARENT = -1;
    public static final int TOP_LEVEL = 0;
    public Element(String contentText, int level, int id, int parendId, boolean hasChildren, boolean isExpanded) {
        super();
        this.contentText = contentText;
        this.level = level;
        this.id = id;
        this.parendId = parendId;
        this.hasChildren = hasChildren;
        this.isExpanded = isExpanded;
    }
    public boolean isExpanded() {
        return isExpanded;
    }

    public void setExpanded(boolean isExpanded) {
        this.isExpanded = isExpanded;
    }

    public String getContentText() {
        return contentText;
    }

    public void setContentText(String contentText) {
        this.contentText = contentText;
    }

    public int getLevel() {
        return level;
    }

    public void setLevel(int level) {
        this.level = level;
    }

    public int getId() {
        return id;
    }

    public void setId(int id) {
        this.id = id;
    }

    public int getParendId() {
        return parendId;
    }

    public void setParendId(int parendId) {
        this.parendId = parendId;
    }

    public boolean isHasChildren() {
        return hasChildren;
    }

    public void setHasChildren(boolean hasChildren) {
        this.hasChildren = hasChildren;
    }
}
TreeView-TreeViewAdapter.java
public class TreeViewAdapter extends BaseAdapter {
    private ArrayList<Element> elementsData;
    private ArrayList<Element> elements;
    private LayoutInflater inflater;
    private int indentionBase;

    public TreeViewAdapter(ArrayList<Element> elements, ArrayList<Element> elementsData, LayoutInflater inflater) {
        this.elements = elements;
        this.elementsData = elementsData;
        this.inflater = inflater;
        indentionBase = 50;
    }

    public ArrayList<Element> getElements() {
        return elements;
    }

    public ArrayList<Element> getElementsData() {
        return elementsData;
    }

    @Override
    public int getCount() {
        return elements.size();
    }

    @Override
    public Object getItem(int position) {
        return elements.get(position);
    }

    @Override
    public long getItemId(int position) {
        return position;
    }

    @Override
    public View getView(int position, View convertView, ViewGroup parent) {
        ViewHolder holder = null;
        if (convertView == null) {
            holder = new ViewHolder();
            convertView = inflater.inflate(R.layout.treeview_item, null);
            holder.disclosureImg = (ImageView) convertView.findViewById(R.id.disclosureImg);
            holder.contentText = (TextView) convertView.findViewById(R.id.contentText);
            convertView.setTag(holder);
        } else {
            holder = (ViewHolder) convertView.getTag();
        }
        Element element = elements.get(position);
        int level = element.getLevel();
        holder.disclosureImg.setPadding(
                indentionBase * (level + 0),
                holder.disclosureImg.getPaddingTop(),
                holder.disclosureImg.getPaddingRight(),
                holder.disclosureImg.getPaddingBottom());
        holder.contentText.setText(element.getContentText());
        if (element.isHasChildren() && !element.isExpanded()) {
            holder.disclosureImg.setImageResource(R.drawable.close);
            //這裡要主動設置一下icon可見,因為convertView重用了,"設置了不可見"的view
            holder.disclosureImg.setVisibility(View.VISIBLE);
        } else if (element.isHasChildren() && element.isExpanded()) {
            holder.disclosureImg.setImageResource(R.drawable.open);
            holder.disclosureImg.setVisibility(View.VISIBLE);
        } else if (!element.isHasChildren()) {
            holder.disclosureImg.setImageResource(R.drawable.close);
            holder.disclosureImg.setVisibility(View.INVISIBLE);
        }
        return convertView;
    }

    static class ViewHolder{
        ImageView disclosureImg;
        TextView contentText;
    }
}
TreeView-TreeViewItemClickListener.java
public class TreeViewItemClickListener implements AdapterView.OnItemClickListener{

    private TreeViewAdapter treeViewAdapter;
    public TreeViewItemClickListener(TreeViewAdapter treeViewAdapter) {
        this.treeViewAdapter = treeViewAdapter;
    }

    @Override
    public void onItemClick(AdapterView<?> parent, View view, int position, long id) {
        Element element = (Element) treeViewAdapter.getItem(position);

        ArrayList<Element> elements = treeViewAdapter.getElements();

        ArrayList<Element> elementsData = treeViewAdapter.getElementsData();

        if (!element.isHasChildren()) {
            return;
        }

        if (element.isExpanded()) {
            element.setExpanded(false);

            ArrayList<Element> elementsToDel = new ArrayList<Element>();
            for (int i = position + 1; i < elements.size(); i++) {
                if (element.getLevel() >= elements.get(i).getLevel())
                    break;
                elementsToDel.add(elements.get(i));
            }
            elements.removeAll(elementsToDel);
            treeViewAdapter.notifyDataSetChanged();
        } else {
            element.setExpanded(true);

            int i = 1;
            for (Element e : elementsData) {
                if (e.getParendId() == element.getId()) {
                    e.setExpanded(false);
                    elements.add(position + i, e);
                    i ++;
                }
            }
            treeViewAdapter.notifyDataSetChanged();
        }
    }
}
TreeView-treeview_item.xml
這裡主要是自己製作多層的清單項目,使用ImageView和TextView,如下。
<RelativeLayout xmlns:android="http://schemas.android.com/apk/res/android"
    android:orientation="vertical"
    android:layout_width="match_parent"
    android:layout_height="match_parent">

    <ImageView
        android:id="@+id/disclosureImg"
        android:layout_width="wrap_content"
        android:layout_height="wrap_content"
        android:layout_centerVertical="true"
        android:layout_alignParentLeft="true" />

    <TextView
        android:id="@+id/contentText"
        android:layout_width="wrap_content"
        android:layout_height="wrap_content"
        android:layout_centerVertical="true"
        android:layout_toRightOf="@id/disclosureImg"
        android:textSize="20dp"
        android:textColor="@color/white"/>

</RelativeLayout>
修改activity_main.xml
在NavigationView裡,加入一個LinearLayout和ListView,如下。
<android.support.design.widget.NavigationView
        android:id="@+id/navigationView"
        android:layout_width="wrap_content"
        android:layout_height="match_parent"
        android:layout_gravity="start">

        <LinearLayout
            android:layout_width="match_parent"
            android:layout_height="match_parent"
            android:orientation="vertical"
            android:background="@color/black">

            <ListView
                android:id="@+id/treeListView"
                android:layout_width="match_parent"
                android:layout_height="match_parent" />
        </LinearLayout>

    </android.support.design.widget.NavigationView>
MainActivity.java
public class MainActivity extends AppCompatActivity {

    private static final String NAV_ITEM_ID = "nav_index";

    DrawerLayout drawerLayout;
    TextView contentView;

    private int navItemId;

    private ArrayList<Element> elements;
    private ArrayList<Element> elementsData;

    @Override
    protected void onCreate(Bundle savedInstanceState) {
        super.onCreate(savedInstanceState);
        setContentView(R.layout.activity_main);

        LayoutInflater inflater = (LayoutInflater) getSystemService(Context.LAYOUT_INFLATER_SERVICE);

        init();

        ListView treeview = (ListView) findViewById(R.id.treeListView);
        TreeViewAdapter treeViewAdapter = new TreeViewAdapter(elements, elementsData, inflater);

        TreeViewItemClickListener treeViewItemClickListener = new TreeViewItemClickListener(treeViewAdapter);
        treeview.setAdapter(treeViewAdapter);
        treeview.setOnItemClickListener(treeViewItemClickListener);

        final Toolbar toolbar = (Toolbar) findViewById(R.id.toolbar);
        setSupportActionBar(toolbar);

        contentView = (TextView) findViewById(R.id.contentView);
        drawerLayout = (DrawerLayout) findViewById(R.id.drawerLayout);
        NavigationView view = (NavigationView) findViewById(R.id.navigationView);
        view.setNavigationItemSelectedListener(new NavigationView.OnNavigationItemSelectedListener() {
            @Override
            public boolean onNavigationItemSelected(MenuItem menuItem) {
                Toast.makeText(MainActivity.this, menuItem.getTitle() + " pressed", Toast.LENGTH_LONG).show();
                navigateTo(menuItem);

                drawerLayout.closeDrawers();
                return true;
            }
        });

        ActionBarDrawerToggle actionBarDrawerToggle = new ActionBarDrawerToggle(this, drawerLayout, toolbar, R.string.openDrawer, R.string.closeDrawer) {
            @Override
            public void onDrawerClosed(View drawerView) {
                super.onDrawerClosed(drawerView);
            }

            @Override
            public void onDrawerOpened(View drawerView) {
                super.onDrawerOpened(drawerView);
            }
        };
        drawerLayout.setDrawerListener(actionBarDrawerToggle);
        actionBarDrawerToggle.syncState();

//        if(null != savedInstanceState){
//            navItemId = savedInstanceState.getInt(NAV_ITEM_ID, R.id.navigationItem1);
//        }
//        else{
//            navItemId = R.id.navigationItem1;
//        }
//        navigateTo(view.getMenu().findItem(navItemId));
    }

    @Override
    public boolean onCreateOptionsMenu(Menu menu) {
        // Inflate the menu; this adds items to the action bar if it is present.
        getMenuInflater().inflate(R.menu.menu_main, menu);
        return true;
    }

    @Override
    public boolean onOptionsItemSelected(MenuItem item) {
        // Handle action bar item clicks here. The action bar will
        // automatically handle clicks on the Home/Up button, so long
        // as you specify a parent activity in AndroidManifest.xml.
        int id = item.getItemId();

        //noinspection SimplifiableIfStatement
        if (id == R.id.action_settings) {
            return true;
        }

        return super.onOptionsItemSelected(item);
    }

    private void navigateTo(MenuItem menuItem){
        contentView.setText(menuItem.getTitle());

        navItemId = menuItem.getItemId();
        menuItem.setChecked(true);
    }

    private void init() {
        elements = new ArrayList<Element> ();
        elementsData = new ArrayList<Element> ();

        Element element1 = new Element("模組A第一層", Element.TOP_LEVEL, 0, Element.NO_PARENT, true, false);

        Element element2 = new Element("模組A第二層", Element.TOP_LEVEL + 1, 1, element1.getId(), true, false);
        Element element3 = new Element("模組A第三層", Element.TOP_LEVEL + 2, 2, element2.getId(), true, false);
        Element element4 = new Element("模組A第四層", Element.TOP_LEVEL + 3, 3, element3.getId(), false, false);

        Element element5 = new Element("模組A第二層-2", Element.TOP_LEVEL + 1, 4, element1.getId(), true, false);
        Element element6 = new Element("模組A第三層-2", Element.TOP_LEVEL + 2, 5, element5.getId(), true, false);
        Element element7 = new Element("模組A第四層-2", Element.TOP_LEVEL + 3, 6, element6.getId(), false, false);

        Element element8 = new Element("模組A第二層-3", Element.TOP_LEVEL + 1, 7, element1.getId(), false, false);

        Element element9 = new Element("模組B第一層", Element.TOP_LEVEL, 8, Element.NO_PARENT, true, false);
        Element element10 = new Element("模組B第二層", Element.TOP_LEVEL + 1, 9, element9.getId(), true, false);
        Element element11 = new Element("模組B第三層", Element.TOP_LEVEL + 2, 10, element10.getId(), true, false);
        Element element12 = new Element("模組B第四層", Element.TOP_LEVEL + 3, 11, element11.getId(), true, false);
        Element element13 = new Element("模組B第五層", Element.TOP_LEVEL + 4, 12, element12.getId(), false, false);

        elements.add(element1);
        elements.add(element9);

        elementsData.add(element1);
        elementsData.add(element2);
        elementsData.add(element3);
        elementsData.add(element4);
        elementsData.add(element5);
        elementsData.add(element6);
        elementsData.add(element7);
        elementsData.add(element8);
        elementsData.add(element9);
        elementsData.add(element10);
        elementsData.add(element11);
        elementsData.add(element12);
        elementsData.add(element13);
    }

    @Override
    protected void onSaveInstanceState(Bundle outState) {
        super.onSaveInstanceState(outState);
        outState.putInt(NAV_ITEM_ID, navItemId);
    }
}